The series of articles on Task organizer for Windows v.5 continues now with one of the most requested and expected features — synchronizatio...

New in MLO5: Sync with Google Calendar

The series of articles on Task organizer for Windows v.5 continues now with one of the most requested and expected features — synchronization with Google Calendar.
What is it for? By and large, the feature provides for viewing selected MLO tasks on the days distributed over the calendar, together with the meetings from other calendars. This way, you can visually assess the whole load of yours and, on top of that, creating events there you automatically add subtasks to your MLO file. This is possible now with the two-way synchronization between a local .ml file and Google Calendar. This means that any change you make in Google Calendar – like editing an event name or changing the date – after the sync will be reflected back in MLO, and vice versa. Let us explore our feature further.

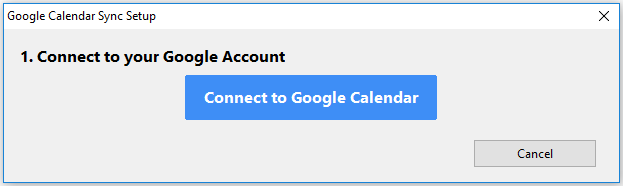
First, you should set up a connection between Google Calendar and MLO. Go to Synchronization-> Configuration-> Google Calendar. Click on “Connect to your Google Account” in the pop-up window:


Log in to your Google account.

Note. The connection process is managed by Google and your login credentials will not be transferred to MyLifeOrganized.

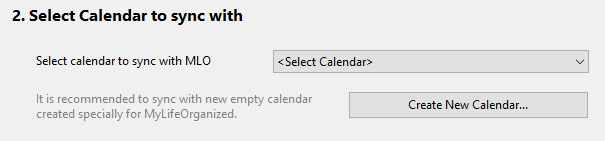
Next, you need to select a calendar to sync with MLO or create a new one, which would be the most desirable option. MLO tasks with date and time will be added as events to this calendar only.


Now you may also set up a filter for MLO tasks which lets you manually pick out only necessary types of tasks to be synced with the calendar. Here’s how it looks like:

Above all, you will be able to select a specific branch of tasks for sync to Calendar. Then, you may set another filter - sync tasks associated with a specific context or flag etc.

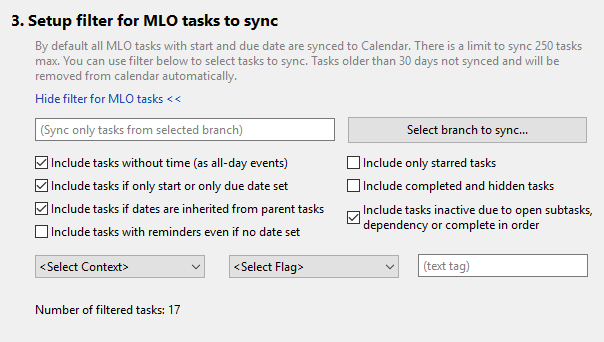
Tip. There is an option to show completed and hidden tasks in the calendar. If this option is not selected, after you complete a task in MLO and sync, the corresponding event will vanish from your Google Calendar.


Although by default all MLO tasks with both start and due date are synced to Calendar, you may select to include tasks with either a start or due date as well. If you like, include tasks without time, marked with a star etc. The number of filtered tasks to be synced with Calendar will be updated automatically.

Tip. There is a limit to sync not more than 250 MLO tasks to calendar. Tasks older than 30 days are not synced and will be removed from the calendar automatically.

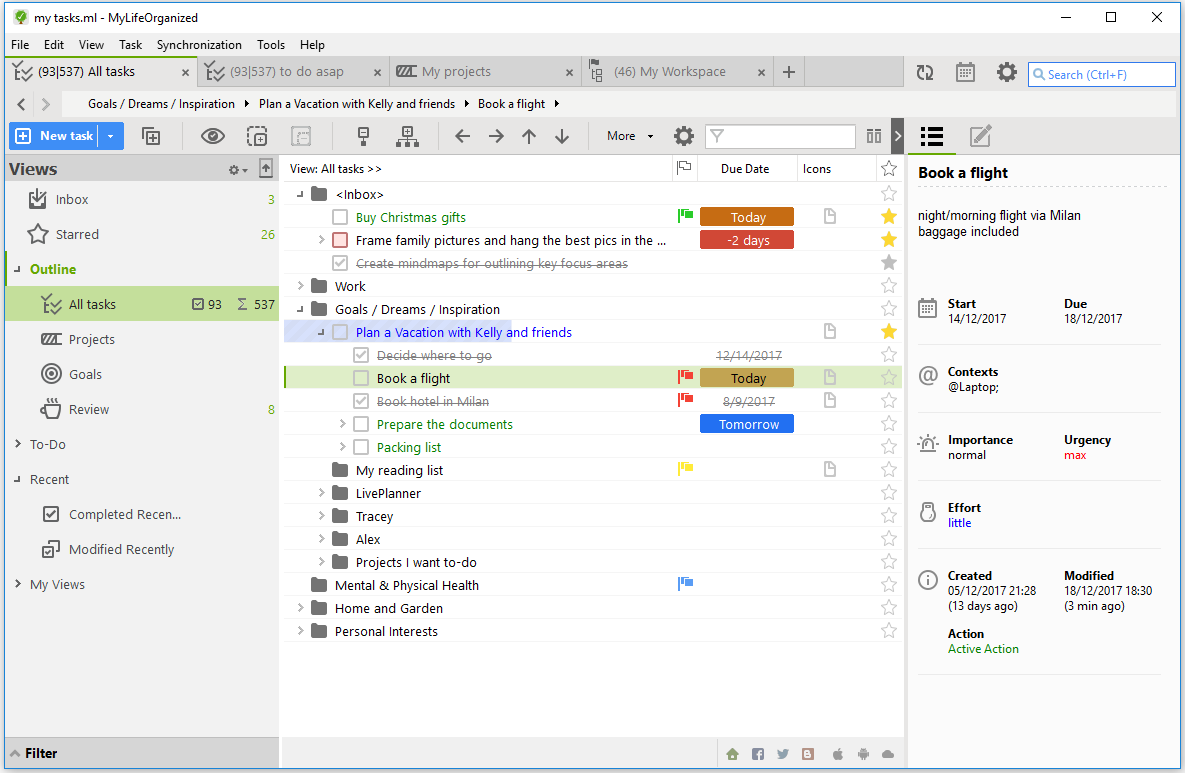
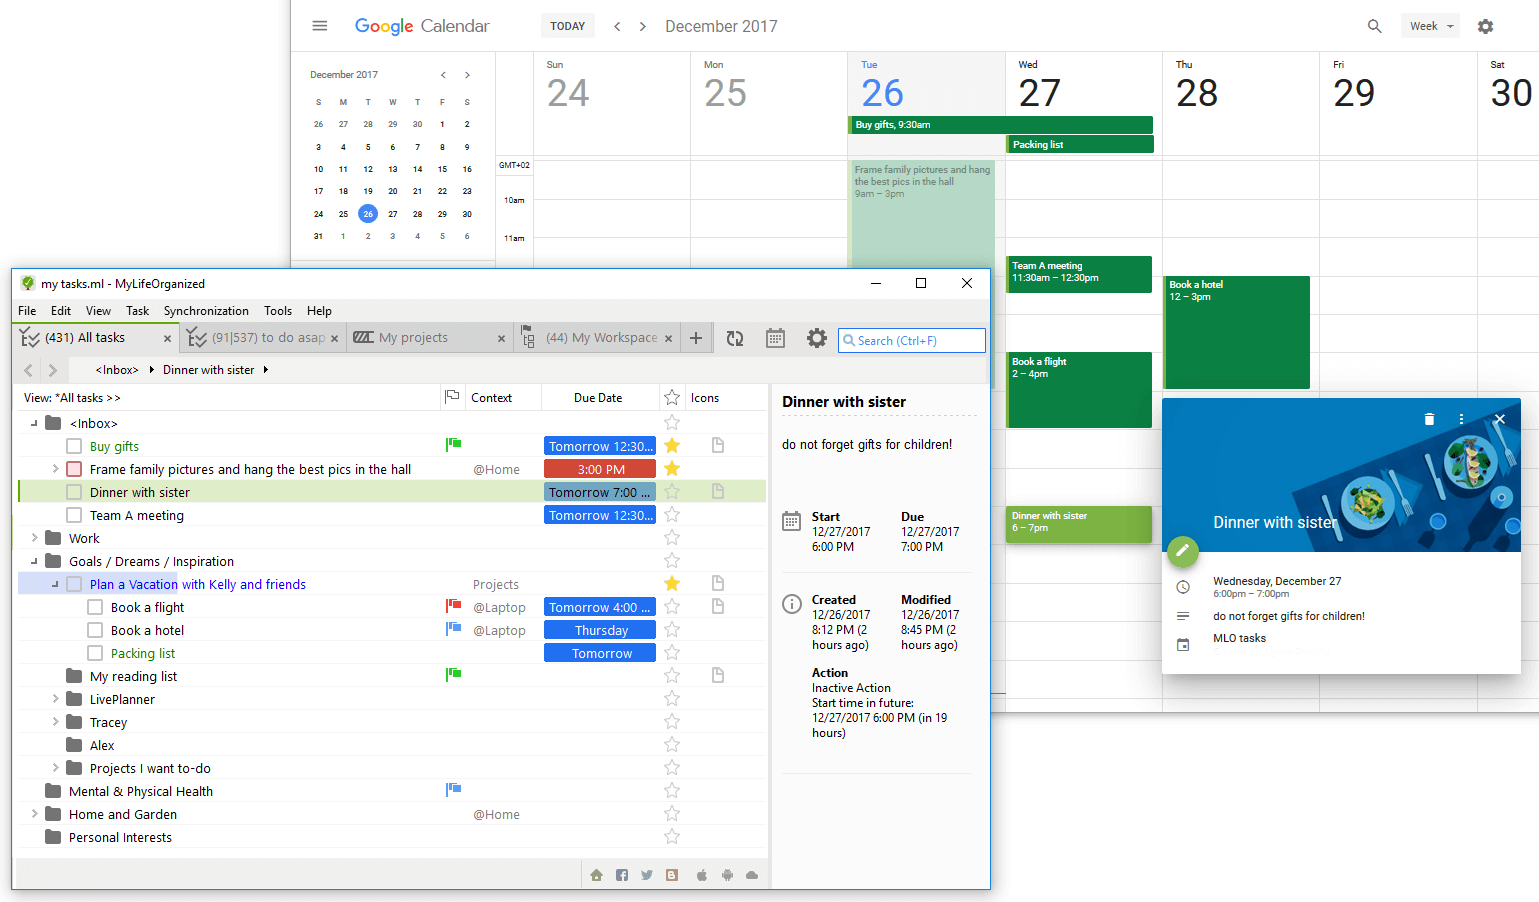
Besides, as you will see, any events created in the selected calendar will be added to the branch you selected for sync in MLO or to Inbox (if no branch is selected for sync) along with the title and description (which is placed to notes), start/due date and reminders. In future you can always move tasks from Inbox to other tasks and projects.

Note. If you set up a reminder in MLO after the task has started, then in the Google Calendar the reminder will be placed at the beginning of the task since Google Calendar supports adding reminders only before event start time.

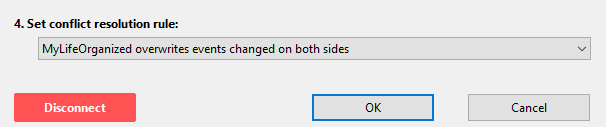
Finally, you are free to select a conflict resolution scenario you prefer and click “OK” to apply the settings:


When you are ready to sync, click on the corresponding button on the toolbar to start synchronization.

Note. There is a daily limitation of 500 requests to be sent to Google Calendar from a single user, this is why the sync process in MLO is manual now. We plan to improve the sync process in future.

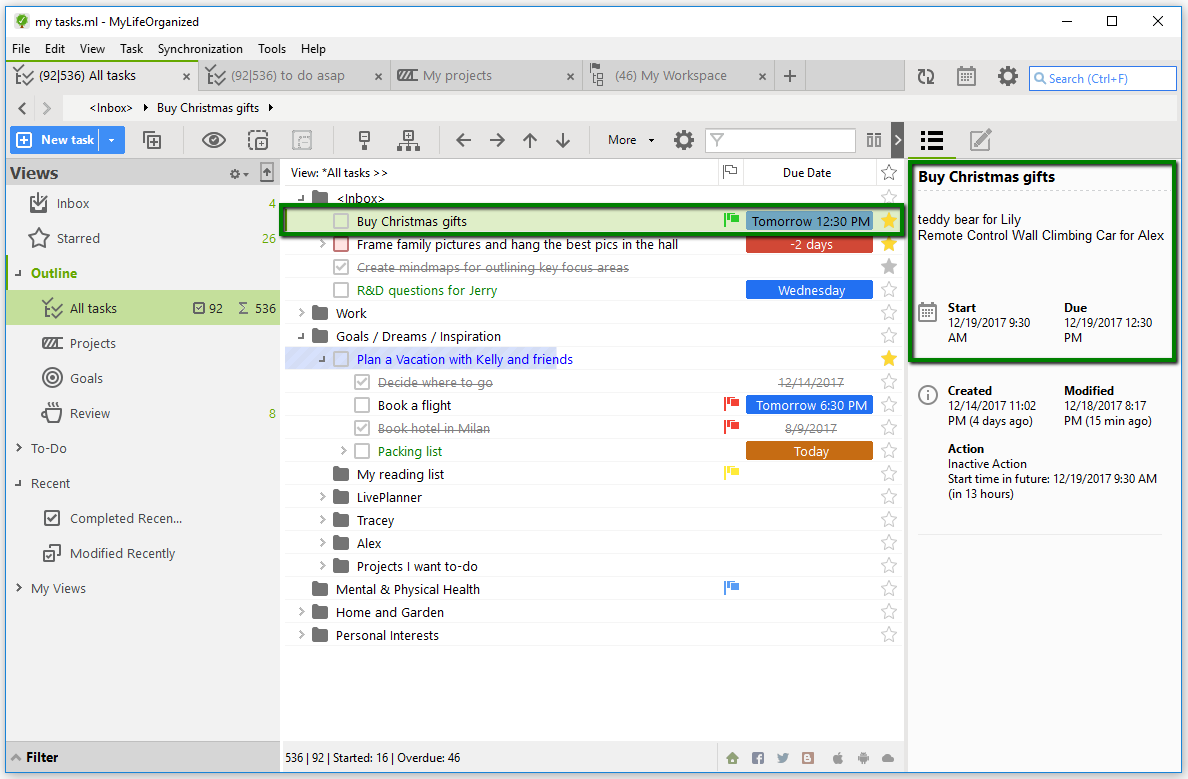
This is what we have in our MLO file:


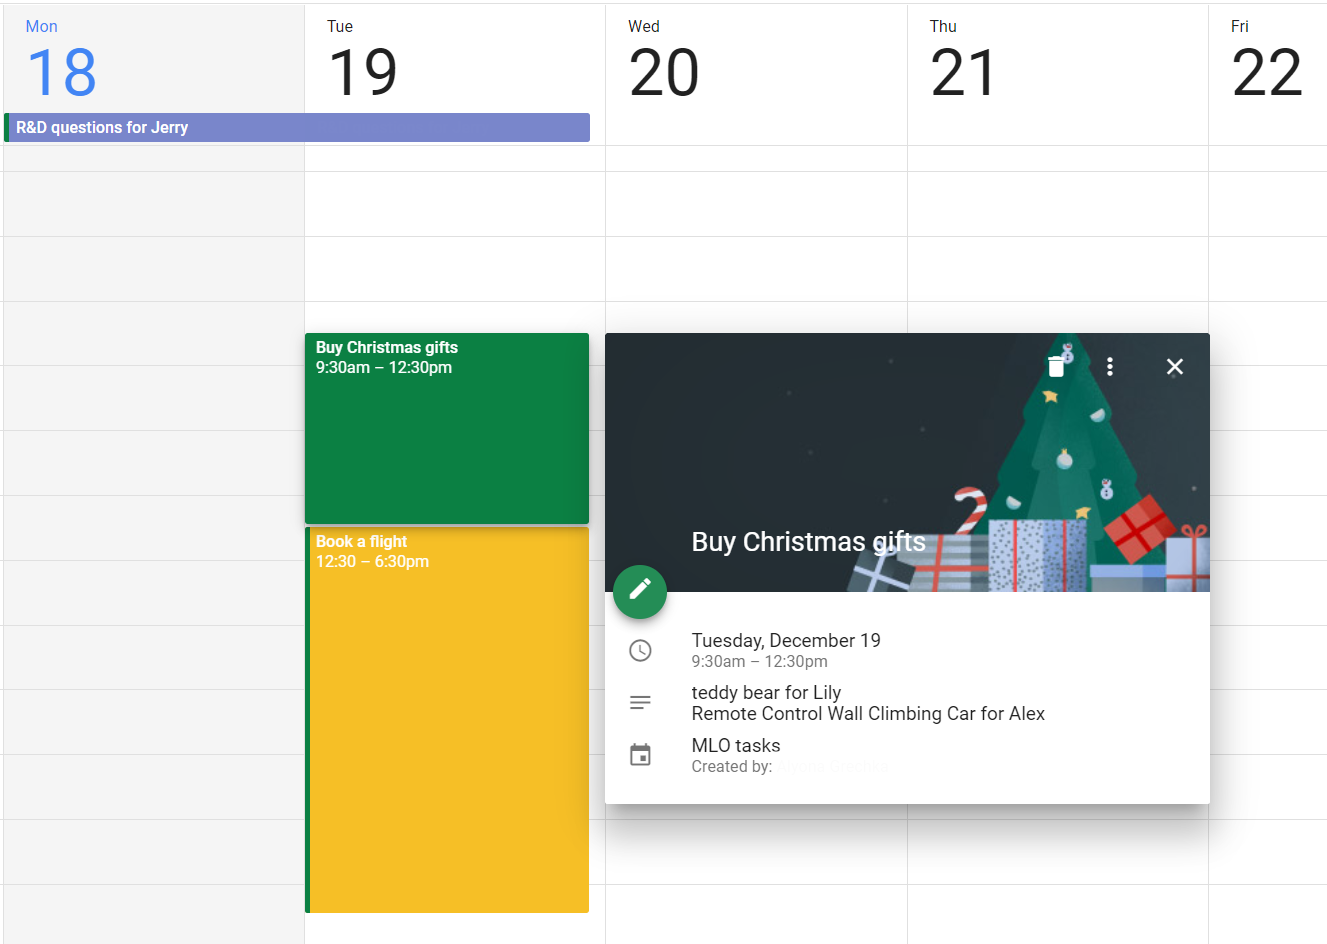
And this is how it looks in the corresponding Google Calendar after sync:


There are several more points to note. Only one .ml file should be synced to the same Google Calendar, so, even if there is a duplicate of this file synchronized through the cloud on another computer, such .ml file should not be synchronized with the same calendar in order to avoid the duplication of tasks. 

Moreover, tasks that no longer meet the sync criteria will be removed from the calendar, therefore the data that correspond the most up-to-date sync settings override all previous data. For instance, you set the checkbox “Include only starred tasks”. After synchronization, the calendar will not show tasks without a star from MLO (corresponded events will be deleted from the calendar), even those that have been displayed before synchronization, because this condition is no longer valid.

The detailed instruction will be available on our website soon.

We hope you will enjoy this handy feature of MLO5 and be able to make the best of the Google Calendar and MLO combination. Please share all your thoughts and impressions with us, we appreciate your support!


The MyLifeOrganized team
Life is easy when organized

2 Comments:

We are now starting the series of articles on Task organizer for Windows v.5 with one of the interesting features called Markdown. Some of y...

Editing Becomes Smarter — Markdown for MLO5

We are now starting the series of articles on Task organizer for Windows v.5 with one of the interesting features called Markdown. Some of you may wonder what it is all about? It is a lightweight markup language and, as you will see, it is a sophisticated notes editing tool which significantly enhances formatting potential.

Let us first start with a small introduction. In MLO5 there are now two sections for notes & task properties:

1. Preview mode
Here you can see task's properties (only those that are enabled for the task) and markdown formatted notes.
The main point here: we have enhanced visibility of notes and properties making it more eye-catching but not cumbersome as before.

2. Edit mode
Here you can manage tasks properties (remains almost the same) and notes using Markdown, a lightweight and easy-to-use syntax for styling.

Preview and Edit mode for Task Properties
There are several ways to switch from one mode to another:
  • Simply click on the corresponding icon on the right.
  • In the preview mode click on the created note — the edit mode will be automatically activated. Click on the preview icon to stop editing there. Thus, notes can be quickly edited even in the preview.
  • There is a hotkey to toggle Preview/Edit as well. The default for this is Alt+~ (can be reassigned in MLO settings).
When you click on another task, the edit mode automatically closes as well.

Now let us discuss how to use markdown itself. The feature is disabled by default, so first you need to turn it on: go to Tools->Options->Appearance and check “Use Markdown format in notes”.

In task notes we support the Markdown Formatting rules specified here (please refer to it for details).

In this article we would like to describe the main elements: headers, emphasis, links and images.

1. Headers

Setext-style headers are “underlined” using equal signs (for first-level headers) and dashes (for second-level headers). For example:

This is an H1
=============
This is an H2
-------------
Any number of underlining =’s or -’s will work.
Atx-style headers use 1-6 hash characters at the start of the line, corresponding to header levels 1-6. For example:

# This is an H1
## This is an H2
##### This is an H5

2. Emphasis

MLO Markdown treats asterisks “*” and underscores “_” as indicators of emphasis. Text wrapped with one * or _ will be made italic wrapped with an HTML <em> tag; double *’s or _’s will be made bold with an HTML <strong> tag:

*single asterisks*
_single underscores_
**double asterisks**
__double underscores__

Note. Emphasis can be used in the middle of a word as well: un*frigging*believable
Headers and emphasis in notes
3. Links

MLO supports two types of links: reference and inline.

Reference-style links use a second set of square brackets, inside which you place a label of your choosing to identify the link:

This is [an example][id] reference-style link.
[id]: http://example.com/  "Optional Title Here"

As for inline links, these are hidden within a text, like this:

This is [an example](http://example.com/ "Title") inline link.
[This link](http://example.net/) has no title attribute.

Please remember, you can also add a link to your MLO tasks there using Task ID (found in Advanced -> Properties for a task or right click for local menu, Copy as -> Copy as local link):

[New task](\\mlo:{53070B55-A8FF-4FAD-8ECD-15D8D429FFAF})

Look how different links are displayed:
Links in notes
Tip: Links to third party services (like Evernote, Trello, Chrome) can be added as well. For example, a link to Evernote will be:  [Evernote](evernote:///view/165522/s417/c7fcd022-75e7609dec/c7fc2-4511-af8e-209dec/)

4. Images

Images added to the notes can be stored on the Internet or locally, on your PC. The images placed to notes are neither saved in MLO nor sent to the MLO Cloud.

The image in our example (see below) has the following syntax: ![bear](http://www.domain-name/file-location.png)

Images in notes
As for images stored locally, they can be added to notes with a reference link, like
 ![toys](C:\Users\Michael\Pictures\Saved%20Pictures\toys.jpg)

Tip: If a folder name contains spaces, replace them with “%20” (see example above). One more option is to use < > around the URL:  ![toys](<C:\Users\Michael\Pictures\Saved Pictures\toys.jpg>)

Note. Gif media can be added to task notes as well.

You may choose to ignore Markdown formatting if you wish. Or, to produce a literal asterisk or underscore at a position where it would otherwise be used as an emphasis delimiter, you can backslash escape it:

\*this text is surrounded by literal asterisks\*

That's not all the information — there are many other Markdown formatting rules for you to discover. Anyway, the main elements open a lot of new opportunities for you and your planning system. The supported syntax will be added to our website later on.

As for now, do you enjoy this update? Is it useful for you? Share in comments.


The MyLifeOrganized team
Life is easy when organized

4 Comments:

Today we are sincerely pleased to be introducing the long-awaited redesign and feature update of our main flagman — MLO task organizer for ...

MyLifeOrganized 5: New UI, and Much More Inside… The public beta is out!

Today we are sincerely pleased to be introducing the long-awaited redesign and feature update of our main flagman — MLO task organizer for Windows v.5.
It is where we combined the technology and tools we have been developing since our start with a new sharp, yet overwhelmingly stylish design, which makes MLO even more effective and convenient in usage. Read on to learn what’s new and enjoy exploring the public beta version! The download link and information on upgrade can be found on our website.
General outlook
Earlier we published the video of MLO 5 presented by our CEO Andrey Tkachuk, the founder and main inspirer. Careful attention to teamwork, quality and versatility of the applications have always played a huge role for Andrey. Having substantial experience in software development and managing big teams for different software development companies Andrey Tkachuk wove his own ideas and then professional task management methodologies into the MLO code. Later the program was reinforced by new great features that made the program more stand out. Read the full interview to learn more about MLO and its founder by the this link.
In MLO 5 our team tried to achieve as simple and clear user interface as it is possible in such a complex program. New carefully drawn and shaped UI elements look harmonic with the background and do not overload the general layout. In particular, we aimed to create icons with well thought-out symbolic meaning and simple easily recognizable forms. 
The task list design has been changed to a more intuitive and up-to-date mainly due to fonts, colors and icons. As before, you can either open or close the panes you use or don't use.
You can also see a status bar on the bottom — it provides information on the view you opened like how many tasks have been started, how many are overdue, time required for the tasks in view and etc. 
Speaking about functionality, there are even more crucial updates to mention here. The MLO team always listens to your requests and comments. We have been really concerned about repeated inquiries for specific features and realised that these features deserve to be incorporated into the new version of MLO.  Therefore, one of major updates deals with Google Calendar sync which makes your MLO tasks visible through Calendar, and vice versa. 
Integration with Google Calendar
We did not forget many of you commenting on formatting the notes, and another huge update to be announced is Markdown which will help to add headings, lists, bold, italic, links, images and so on – by applying relatively simple and non-intrusive markup.  Later you will get acquainted with these features in more detail.

Very noticeable changes were made in the task properties area. Now there is the preview pane which displays only those properties that you set up for the task (will be explained in one of our next posts). There are some extra options as well, for example, you can now mark a task as reviewed directly from the Preview pane.

Another important set of UI updates concerns new settings dialogues giving much more space for bettering and customization. One of such is the Manage Views where you can choose to show or hide a specific view similar to our mobile version, set up counters (another great new functionality!), create and delete views etc.

Manage Views dialogue
This is not the whole list of updates, there are a few minor updates that are worth mentioning. For example, filtering by text, sorting tasks by clicking on the header, or completing more than one task at once by pressing space.
And this is just to start — we will continue working on MLO5. We are going to improve it with another nice addition for rich visual experience — support of scalable UI for high resolution monitors, so that you will see sharper text and more details in pictures. Besides, we are currently working on the cloud auto-sync improvements, status bar improvements, adding more hotkeys for commands, simplifying the markdown usage as well as improvements for Sync with Google Calendar (based on your feedback) and more.
Enjoy playing around with the public beta of MLO 5! The version has proved to be fully stable - the Beta team has been testing it for quite a long period. You can install it over your current version and use for free for the first 15 days. After that you need to proceed with upgrade (free or paid) to continue using the new features. You can always return to the initially installed version at any time. More info on our website. The main (not beta) version will become available a bit later.
Download MLO 5 public beta
We stay assured that the updates backed by your feedback will make your interaction with MLO more productive and gratifying, and your impressions are going to be as smooth and inspiring as ours. Thank you for making MLO better!

Feel free to share your thoughts on the MLO5 features, your feedback is always welcome!


10 Comments: